




Tennis Ball Launcher Settings Guide: Speed and Oscillation Basics
A tennis ball launcher becomes useful when its settings match the skill you want to practice. Speed determines more than how hard the ball feels, while oscillation changes whether you repeat one contact point or move between different areas of the court. Turning both controls up at once may create a hard workout, but it rarely shows which setting is helping or hurting the drill.
This guide focuses on the two basics: choosing a playable launch speed and deciding when to keep the feed fixed or add oscillation. Spin and feed-interval programming affect the same ball flight, but they deserve separate treatment rather than being compressed into one setup formula.
How a Tennis Ball Launcher Delivers the Ball
Many powered launchers guide a ball from a hopper into rotating wheels, which grip and accelerate it toward the court. Wheel speed influences launch speed, while differences between wheel speeds can influence spin. Direction, elevation and oscillation then shape where the ball travels.
The player experiences all of those settings together. A moderate launch can still feel demanding when it lands deep, bounces high or arrives after wide movement. That is why the number on a speed control should be treated as one part of the setup, not as a complete measure of drill difficulty.
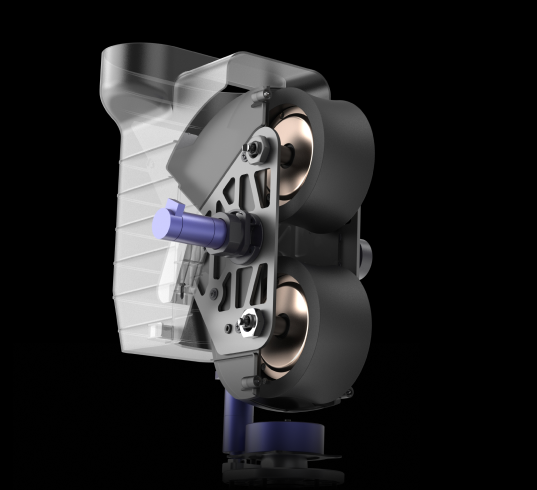
Set Speed for the Ball You Want to Receive
Start with the incoming ball, not the highest specification the launcher can reach. The useful setting is the one that produces the intended depth, bounce and arrival time while allowing organized preparation.
Begin Below Match Pace
For a new drill, reduce speed until you can recognize the ball, move into position and complete the stroke without rushing. Fire a few test balls before beginning the set. If they land too deep, adjust speed, elevation or machine position instead of assuming that speed alone is responsible.
Judge the Bounce, Not Only the Launch
The same launch speed can produce a different experience when the ball lands shorter, carries more spin or reaches a different part of the court. Watch the height and depth after the bounce. A feed that looks moderate out of the machine may still hurry the player if it jumps into the contact zone quickly.
Increase Speed in Small Steps
Add speed only after contact, balance and recovery remain repeatable. Keep direction and oscillation unchanged during the test so you can see the effect of the adjustment. A useful progression makes the ball more demanding without changing the stroke into a late block or uncontrolled swing.
Understand What Oscillation Changes
Oscillation moves the feed away from one fixed direction. Depending on the machine and selected mode, it may alternate between defined positions or distribute balls across a wider area. Its main training effect is not simply variety; it adds recognition, movement and recovery.
Fixed Direction Builds a Reference Point
A fixed feed helps you repeat the same preparation and contact zone. It suits early technical work, target practice and any session in which you want to isolate one variable. Fixed does not mean motionless: you can still recover around a marker after every shot before returning to the expected ball.
Narrow Oscillation Adds Manageable Movement
Once the fixed pattern is stable, use a narrow spread that requires adjustment steps without forcing a sprint. The player should still arrive balanced and recover before the next ball. If movement immediately becomes desperate, reduce the spread, speed or feed frequency rather than trying to survive the pattern.
Wider Oscillation Changes the Drill Goal
A wide pattern trains court coverage and recovery more than a single contact point. It can be appropriate for conditioning or movement-based practice, but it is a poor choice when the main goal is a small technical change. Wider coverage should be introduced as a new task, not treated as a simple upgrade from fixed feeding.

Coordinate Speed and Oscillation Without Guessing
The safest way to build a drill is to change one demand at a time. Begin with a fixed direction and a manageable speed, confirm the landing area, then decide whether movement serves the training goal.
| Practice goal | Speed approach | Oscillation approach |
|---|---|---|
| Stroke contact and spacing | Comfortable and repeatable | Fixed direction |
| Directional control | Moderate enough to preserve the target | Fixed or two defined locations |
| Footwork and recovery | Below the speed that causes rushed contact | Narrow spread first |
| Court coverage | Adjusted to the player's movement capacity | Wider spread in short sets |
After changing one setting, observe several balls rather than judging a single feed. Check whether the ball lands in the intended area and whether the player can prepare, strike and recover in the required pattern. If two settings change together, the cause of any breakdown becomes difficult to identify.
Use Court Position as Part of the Setup
Moving the launcher changes the angle and distance of the feed even when its controls stay the same. A centered baseline position is a practical reference for many groundstroke drills, while an offset position can create a more specific crosscourt or down-the-line path.
Test the setup with the court empty. Confirm that every selected direction lands safely inside the intended area before stepping into the drill. Make sure loose balls, targets and equipment remain outside the movement path.
How TERO Supports Speed and Placement Practice
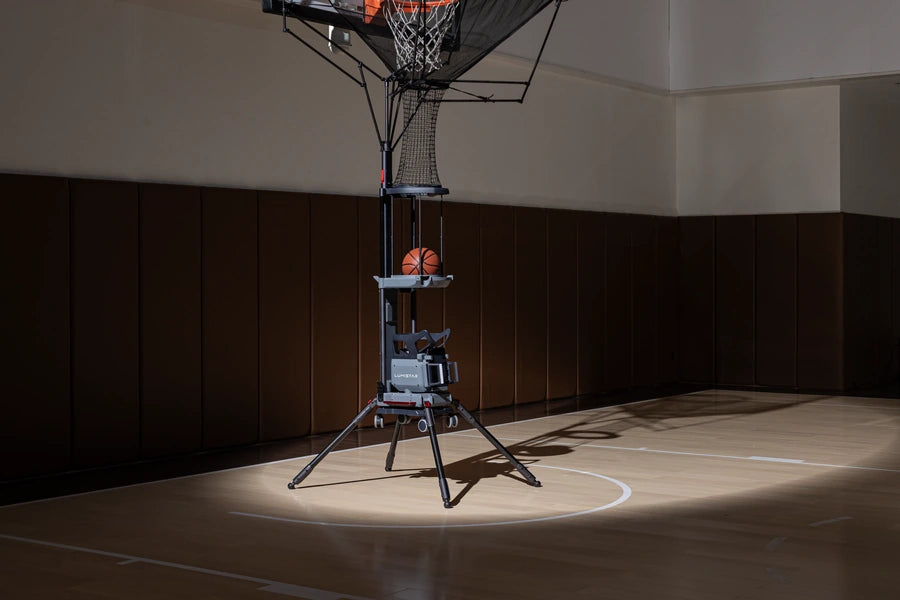
TERO is a tennis training machine designed for repeatable solo practice. It supports app-customized training patterns, speeds up to 87 mph and 35 selectable placements. Those maximum capabilities provide room to progress, but they are not targets for every session.
Use the app to build a controlled pattern around the drill goal, then begin below the player's limit. Wristband voice control can reduce trips back to the machine for supported changes, which helps preserve practice flow without encouraging constant adjustment.
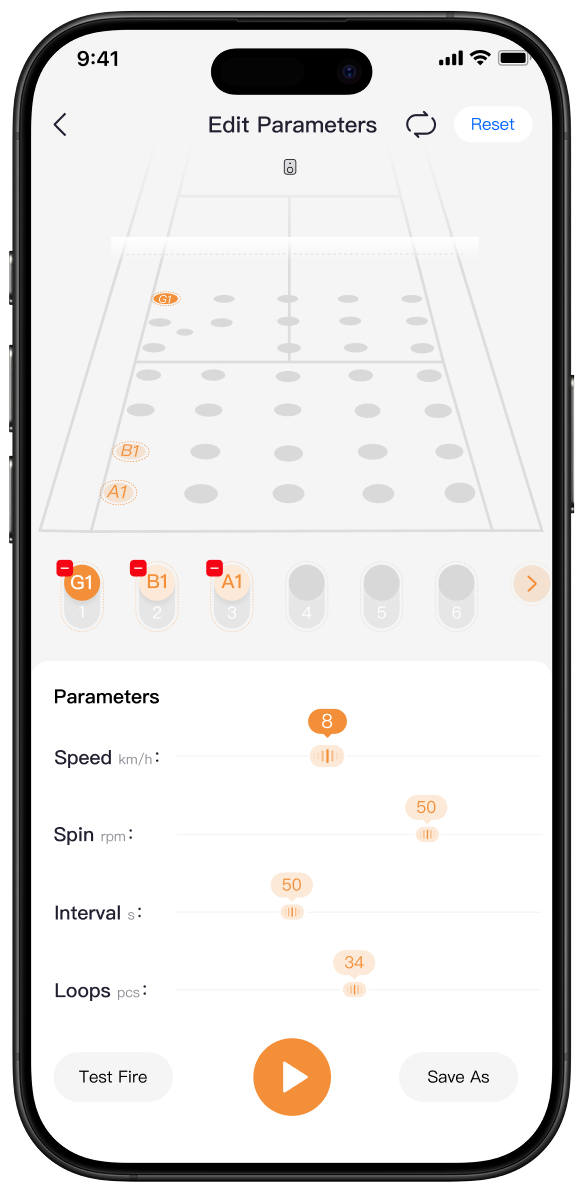
TERO also offers preset drills, but a preset still needs to fit the player. Review the speed, locations and movement demand before beginning. If the pattern is too difficult, simplify it rather than treating completion as the goal.
Keep Feed Interval and Spin as Separate Decisions
Speed and oscillation are easier to evaluate when other settings remain stable. Feed interval determines how much time separates launches, while spin changes the ball's flight and bounce. Adjusting all four variables together turns a clear drill into an uncontrolled test.
For a detailed timing progression, use the guide to setting an AI tennis ball machine feed interval. When working on basic launcher setup, choose a generous interval and familiar spin first, then focus on speed and direction.
Common Setup Mistakes
Starting With Oscillation On
If you have not confirmed the fixed landing point, oscillation hides whether the base setup is correct. Test one direction first, then add movement after the ball path is predictable.
Using Maximum Speed as a Benchmark
Maximum speed describes capacity, not the correct training level. A slower feed that supports clean preparation and a specific target can produce more useful repetitions than a fast feed that changes the stroke.
Making Large Changes After One Miss
One unusual bounce or contact does not always indicate a setting problem. Watch a short sequence, check ball condition and make one small adjustment. Repeated evidence is more useful than reacting to every ball.
What a Launcher Cannot Reproduce
A machine can deliver repeatable balls and structured movement, but it does not reproduce every opponent cue, tactical decision or score-pressure response. Predictable oscillation can also encourage early movement if the player begins guessing the next location.
Use launcher practice to build a defined stroke or movement pattern, then transfer it into coached sessions, partner rallies and point play where the next ball is not controlled in advance.
Conclusion
A useful tennis ball launcher setup begins with a playable fixed feed. Choose speed by the depth, bounce and preparation time it creates, then add narrow oscillation when movement supports the drill. Wider coverage belongs in short, purposeful blocks rather than every session.
Change one setting at a time, test several balls and judge the result through contact and recovery. TERO provides the speed range, selectable placements and app-based patterns to support that progression, while the player or coach decides how much difficulty is appropriate.
Frequently Asked Questions
What Type of Tennis Balls Should You Use in a Ball Launcher?
Use balls that meet the machine's current operating instructions and keep the batch reasonably consistent in wear and condition. Remove wet, damaged or badly worn balls because they can change feeding and bounce behavior.
Can a Tennis Ball Launcher Replace a Practice Partner?
It can provide repeatable feeds and dependable solo repetitions, but it cannot reproduce every visual cue, tactical choice or irregular ball from a live opponent. Use it alongside partner play and coaching when possible.
How Long Should a Tennis Ball Launcher Session Be?
Session length depends on drill intensity, player readiness and court time. Divide practice into focused blocks with recovery breaks, and stop or simplify the drill when fatigue begins changing movement or stroke quality.